Isometric Starling – Part III
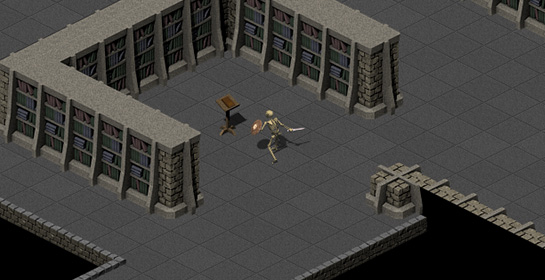
In my last post I showed the conversion of Tonypa’s isometric tutorial to AS3 Starling. With that under my belt it was time to build my own isometric engine and see what Starling could handle. I will go into some detail on the various choices I made, but for now, here’s what I managed to achieve:
- runs at a solid 60fps (so long as you have hardware acceleration)
- a large map of 70×100 tiles
- integration with a map editor
- only 3 draw calls with up to 500 tiles on screen
- texture cache and image pools
- very low memory usage
- an animated character
TARGET – Flashplayer 11.4, Starling and ActionScript 3
CONTROLS – W,A,S,D and arrow keys
Flare engine
If you are looking at the tiles thinking you have seen them before, you would be right! The tiles and map are from Flare by Clint Bellanger. This project has since been split into the Flare Engine and the Flare Game. After seeing this awesome project it seemed crazy to reinvent the wheel and it gave me the perfect opportunity to focus on the Starling side of things.
By using the Flare maps I had a complete map with collision data, layers, tile images, all ready to go. Also one of the biggest and coolest features is that they are built in Tiled. Which basically means by using this map system you have your very own map editor for all your isometric levels!
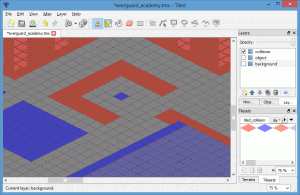
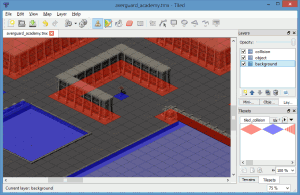
Tiled and Flare maps
Layer setup
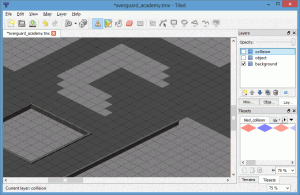
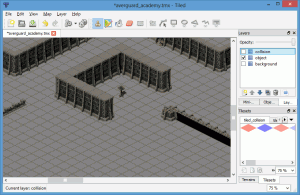
Flare maps are setup with 3 layers; collision, object and background. Similar to the tutorial conversion in my last post, the background layer is on the bottom. The object layer becomes the foreground layer. Collision becomes a new addition, and a great one at that. With all collision data being in this layer, the art is now seperated. A great improvement on tying the art to collision. See below for the setup in Tiled:
Compression
One very cool feature in Tiled is layer compression. There are a few options but I stuck with Base64 (zlib compressed). This converts your array of tile numbers to a compressed string. For the Flare map I used this reduced the filesize from 47KB to 6KB. As another example it took the background layer from 16384 characters to just 2008 characters! If you are still not convinced see one row of the map below.
From this:
16,16,16,16,16,16,0,0,0,0,0,0,0,0,0,0,0,0,0,0,0,0,0,0,0,0,0,0,0,0,0,0,0,0,0,0,0,0,0,0,0,0,0,0,0,0,0,0,0,0,0,0,0,0,0,0,0,0,0,0,0,0,0,0,0,0,0,0,0,0,
16,34,16,16,16,16,0,0,0,0,0,0,0,0,0,0,0,0,0,0,0,0,0,0,0,0,0,0,0,0,0,0,0,0,0,0,0,0,0,0,0,0,0,0,0,0,0,0,0,0,0,0,0,0,0,0,0,0,0,0,0,0,0,0,0,0,0,0,0,0,
16,16,16,16,16,16,0,0,0,0,0,0,0,0,0,0,0,0,0,0,0,0,0,0,0,0,0,0,0,0,0,0,0,0,0,0,0,0,0,0,0,0,0,0,0,0,0,0,0,0,0,0,0,0,0,0,0,0,0,0,19,17,18,17,16,0,0,0,0,0,
To this:
eJztWouO4yAM5BPaptuT7rXSfsE9/v/frpFqdXZuAEOBJG1GQm0IocTY4zG7hxDCQbRXx2yDj7DbhaF85ZntMl3b8dpOt8/Yu6It/obnt8vp1mb7zO95jIx7ZX
Tilesets
For the demo at the top of this post I used 2 tilesets. One for the background/foreground tiles and one for the skeleton. These could have been compressed more with a licensed version of Texture Packer or similar. Software like this makes use of every pixel in your spritesheet! Thanks to Flare engine, see the spritesheets I used in the demo:
![]()
![]()
Large maps
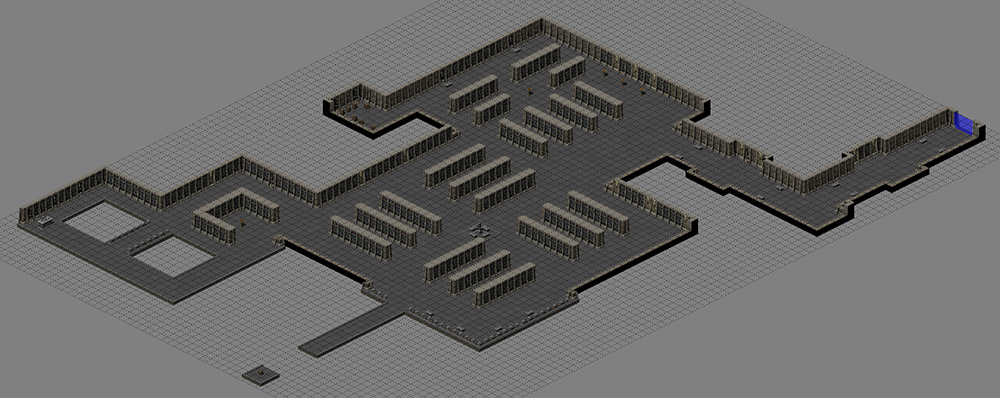
Flare maps are made at 70×100 tiles. This was the perfect testbed for my demo. At that size it is large enough to prove whether Starling is a viable isometric solution or not. See below for a zoomed out view of the map used in the demo.
Getting a Tiled map into Flash
This is actually a very easy process. You simply embed your TMX map file and parse as necessary. It is just XML! I found some great TMX parsing libraries which do the leg work for you. In the end I found them a bit bloated though and made my own cut down version. Here are two libraries for reference, Tmx-parser and as3-tiled-reader. If you are interested in this approach, they would be a great start.
Extendable
At the moment this map is just scratching the surface of Tiled. You can add as many layers and tilesets as you want. There is also objects and object layers built in. With these you can setup enemy layers and pass variables into your engine! Tiled is really a one stop shop for map setup.
Performance
A whole bunch of tweaks and tricks went in to getting the best performance I could in the demo. I will go into some detail below.
Texture cache
To avoid any awkward stuttering in the display I loaded all necessary textures at map load and stored them in a Vector. This means I didn’t need to create any new Textures during gameplay. Often new object creation or garbage collection is the cause of jerky frames.
private var _tileTextureList:Vector.<Texture> = new Vector.<Texture>();

// loop through your needed textures and add to the Vector
var texture:Texture = _textureAtlas.getTexture(tileNames[i]);
_tileTextureList.push(texture);
Image pooling
Another great object creation/detroying avoidance tool is an Image pool. For the demo I created 500 images in an Image pool for re-use. Anytime I needed a new tile image, I would take an image from the pool and assign a texture from the Vector above. This meant there was no new object creation during this process. As you can imagine, when scrolling around a level continuously this is a big saver! Basic usage shown below. There is plenty of information on this topic so I won’t go further into this.
ImagePool.initialize( 500, _defaultTexture);

// get an image from the pool
var image:Image = ImagePool.getImage();

// put an image back into the pool after use
ImagePool.putImage(image);
Depth sorting
Checking hundreds of Sprites/Images at 60 frames per second for position and changing their depth can be an expensive operation. Luckily, I learnt about layers from the tutorial conversion. By seperating the background tiles out I now only have to depth sort the foreground tiles. This more than halves the number of Images needed to depth sort. You can even tweak it a bit more by not sorting depths every frame. If you work out the distance your player/enemies can travel, your frame rate, when a tile row/column is swapped out, you can get the optimal number of times you NEED to depth sort.
Collision detection
For demo purposes I just needed collision at a tile level for the player. So I set about finding a solution that references the collision array. At first this seemed very easy, but you quickly realise that you need to check a rectangle, rather than just a point. I’m not sure if my solution is the best, but it got the job done. It works by getting the direction the player is travelling and checking the two points that can collide with the collision array. I will walk you through an example:
The player is heading right/east
// map a new collision rectangle in 2D space
_collisionTwoDRect.x = _oldTwoDPt.x + SPEED;
_collisionTwoDRect.y = _oldTwoDPt.y;

// pass this out to a collision function that returns a new 2D point
_newTwoDPt = _map.getCollideEastBy2dRect( _collisionTwoDRect );
Check the extreme top right and bottom right points for collision
var toprightTileID:uint = getTileIDBy2d( playerRect.right - 1, playerRect.top );
var botrightTileID:uint = getTileIDBy2d( playerRect.right - 1, playerRect.bottom - 1 );
var colIndex:int = Math.floor( playerRect.x / _tileWidth );

if ( toprightTileID > 0 ) {
	//hits top right tile which is not walkable
	return new Point(colIndex * _tileWidth + _tileWidth - playerRect.width, playerRect.y);
}
else if ( botrightTileID > 0 ) {
	//hits bot right tile which is not walkable
	return new Point(colIndex * _tileWidth + _tileWidth - playerRect.width, playerRect.y);
}
else {
	//both tiles are walkable so no collision
	return new Point(playerRect.x, playerRect.y);
}
Move the player
// convert new 2d to iso pt for display
_newIsoPt = IsoUtils.twoDToIso(_newTwoDPt);
_diffx = _newIsoPt.x - player.x;
_diffy = _newIsoPt.y - player.y;

// display the player in isometric view
player.x += _diffx;
player.y += _diffy;
And the buzz kill for this type of collision… you need to do it for all angles you allow your character to move. In the demo case, this was four. If you wanted eight way movement you would have to allow for that.
Done
Well if you are still reading you probably deserve a beer about now! I hope you have learnt a thing or two from my experiments with isometric Starling. Go forth and prosper!
But what’s next?
As you can imagine I got very excited at the possibilities of this demo. Below is a list of things I wanted to add:
- enemies
- teleports
- doors
- keys
- pickups
- sound
- weapons
- more levels
I did go ahead and add the teleport, that’s a given. But after some further investigation I really needed an entity framework or gaming framework to achieve what I wanted. It was quickly becoming cumbersome adding pick ups, switches, etc, without a way to tie it all together. If I had the time I would most likely build on top of StarlingPunk or something similar. Ash would be another good option. Unfortunately I have just moved country and don’t have the time right now. Though I am happy to have completed this series of blog posts before 2014!
Credits
I quick shout out to influences throughout this project. Thanks for your code ![]()
http://www.tonypa.pri.ee/tbw/
https://github.com/clintbellanger/flare-engine
http://www.mapeditor.org/
http://forum.starling-framework.org/
http://gamua.com/starling/
https://github.com/asaia/StarlingPunk
https://github.com/Draknek/FlashPunk



I made a pseudo-isometric game concept with away3d. All I had to do was make a ground plane and point a camera down at it with narrow lens focus. I definitely think if your gonna use 3d-rendering, you might as well just use 3d.
Glad to see someone tackling this challenge. The main concern for Isometric Starling is performance on mobile for larger games with lots of tiles or characters due to spritesheet memory limits. You’ve shown that it’s definitely possible on desktop though, and if a game has a limited tileset or limited characters, the potential on mobile is there too.
My friend, it looks like you and I took the same road
http://www.ericparlier.com/tags/StarEngine
Happy to see someone else doing it
Great to see another starling iso engine
Pingback: lance
It’s looks very good . I’m also trying to create iso engine, but how I can catch mouse events i.e where the player is click on the map – tile, object , enemy. Could you give me some advice ?
Hi Dave, there are lots of options and a mix of a few might suit.
Listeners
– Use a TouchEvent.TOUCH or similar on the objects, enemies if there are only a few.
HitTestPoint
– Use a hitTest or hitTestPoint to get the objects under the click/tap. Then handle accordingly.
Math
– Use the mouseX and mouseY in your Map sprite. Then change this to non-Iso and divide by tile height and width to get the index of tile.
Hope this helps and is the three ways I could think of off the top of my head.
Thanks Murdoch.
I want to develop a isometric game for mobile. Am looking for a isometric framework which can be used with the starling. I found as3isolib starling port but that is not working for me. Can you please suggest me which framework your using?
Hi Raju
The as3isolib starling port really is the only and best option I know of for Flash/Air. I haven’t seen another framework.
I did want to build on top of StarlingPunk to get an Entity system but never spent the time. Currently there is no framework in my code which is the issue. Just borrowed concepts from StarlingPunk and as3isolib. So while it works for my example project it’s not very flexible.
Have you considered trying Unity? http://unity3d.com/
Wow. Really great tutorial . Are you thinking to publish the source on github ? I think this can be a base for very good open source isometric framework.
Hi Lans, no plans at this stage. It is really old now and relies on some libraries that no longer exist. I am sending everybody to as3isolib port to starling https://github.com/HiWill/as3isolib_starling which is much more comprehensive than my build. It also didn’t exist when I did this project or I would have probably used it myself!
Thank you for the answer. I ask because recently I try some things with haxe language ( very similar to as3 syntax and can compile to flash) , and looking for good and simple isometric engine . I found only this https://github.com/kasoki/openfl-tiled , but your work looks better and I think easy can be port to haxe with same performance as Starling. For that I was thinking it can be very good base for simple , robust framework.
Unfortunately this is not the solution you expect. I am using Starling and parts of StarlingPunk. Without Starling or another GPU framework I wouldn’t get the speed you see. Have you looked into Citrus Engine? http://citrusengine.com/
I never use Citrus, but what I’m looking for is something simple,fast and integration with a map editor. For that your solution fit me the best. I’ll try to use your tutorials to create something similar on haxe ( with haxe I can use GPU). As I wrote your code can be very good base, but I’ll try to make something similar . Thank you for you help
Do you mind if I email you? Can catch up over that.
Sure. No problem.